

There are numerous ways to recover an unsaved word document was a very tedious or next to impossible task in previous versions of the Microsoft Word editions.
Microsoft word has a new feature to recover unsaved word document.
Inbuilt – Recover unsaved word document
Page Contents
This new feature has saved a lot of efforts and there is no need to worry to save your word document everytime.
- Open Microsoft Word
- Click on File Tab
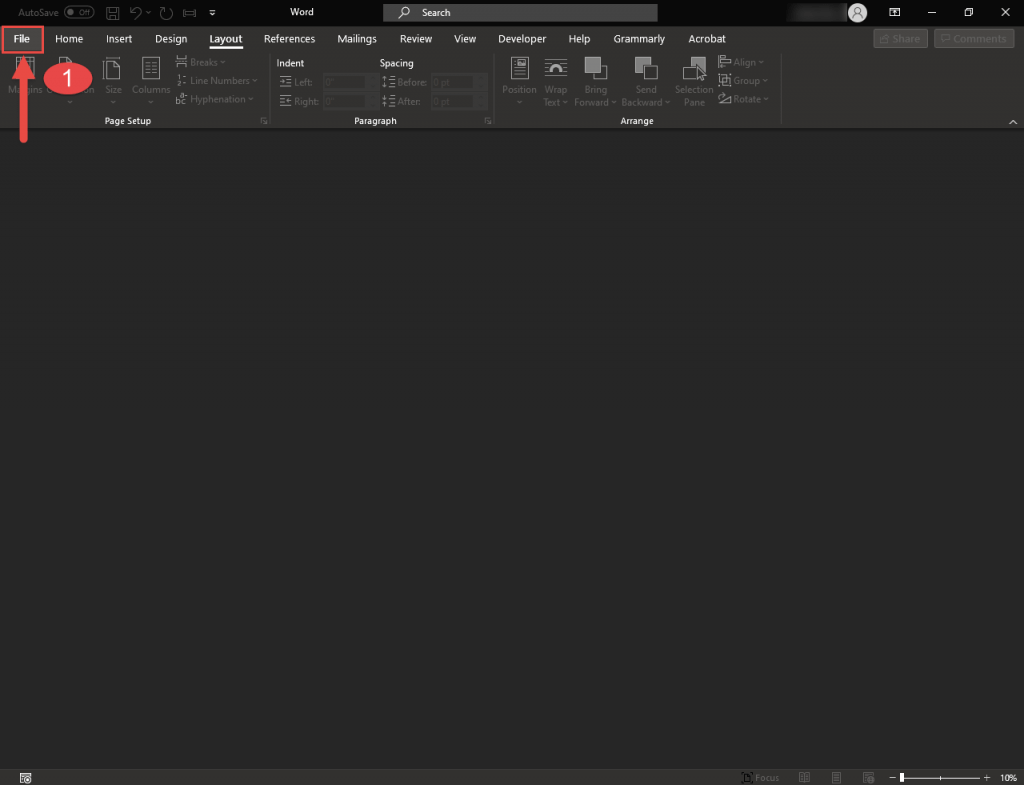
- Click on Open and Recover Unsaved Documents as explained in the screenshot below.
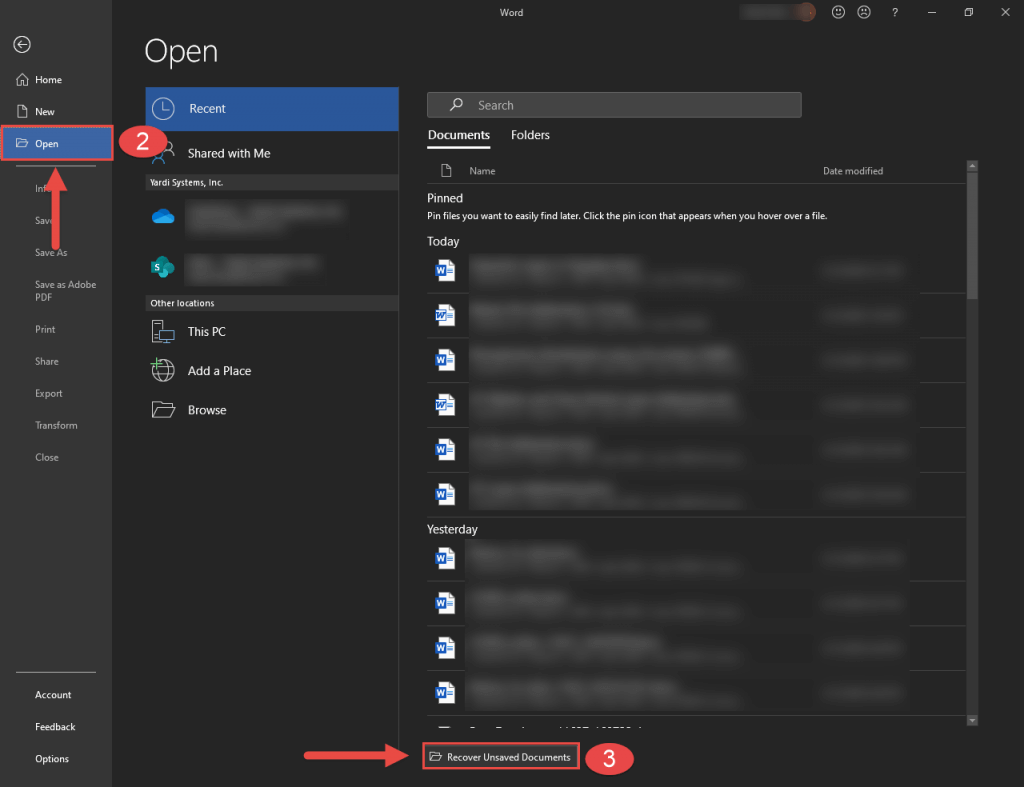
- Under the opened folder browse for your Unsaved word document.
Please note that the Unsaved word documents are in (.asd) format as shown below.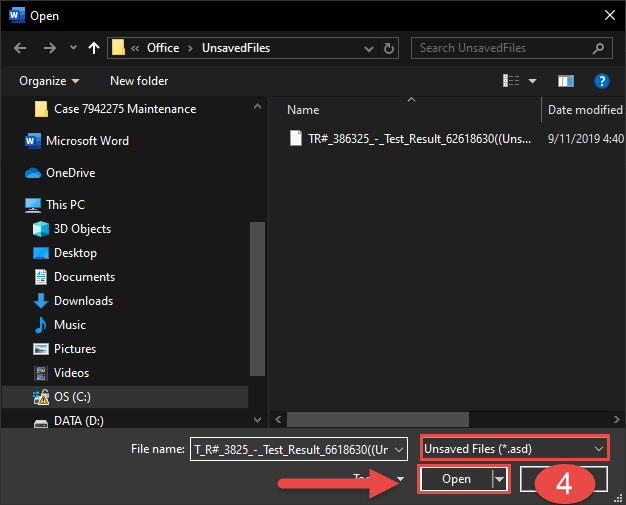
- The files should contain your last made changes. Save the recovered file without any further delay.
NOTE: If you cannot find your files by the above process, you can also try searching the unsaved word documents with file format (.asd)
Using Search to Recover Unsaved Word Document.
- Open File Explorer and go to the search box to the extreme right.
- Under Search – Refine – Other properties – file extension or you can directly enter the following syntax to search : “fileextension:.asd” without quotes.
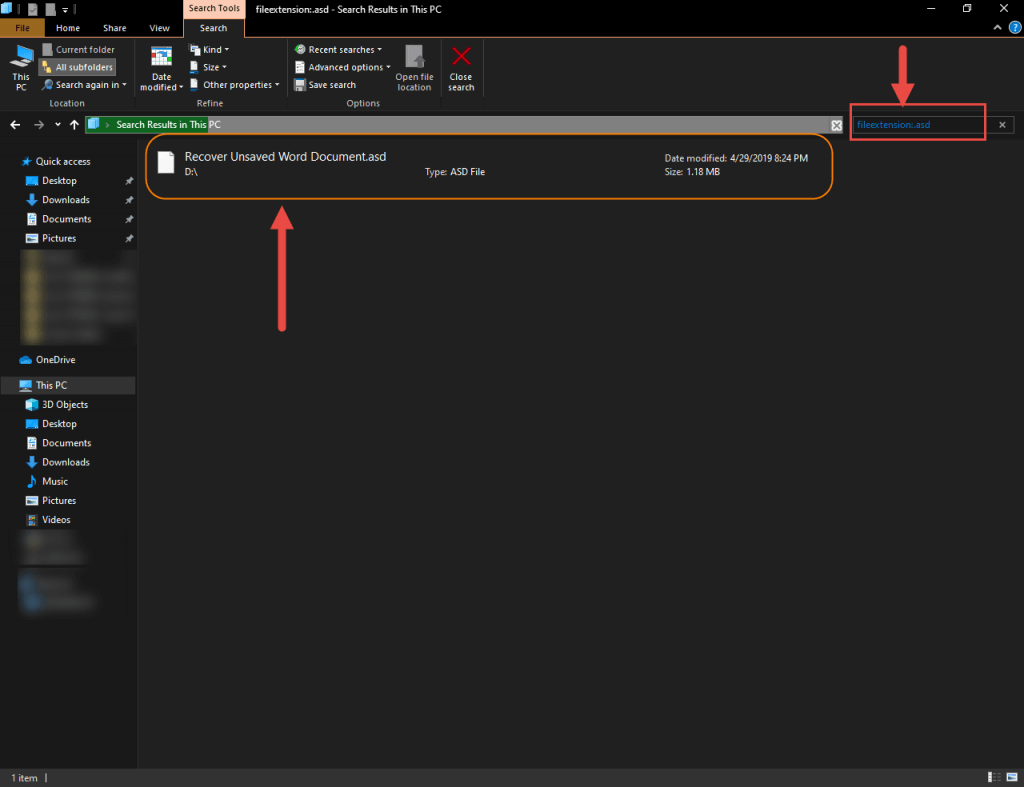
- Browse this file in word document to open and save it right away.
Using Word to Find a Backup
-
Click on the File menu and select Open.
-
Select Browse.
-
Go the recent location where you saved any version of the document.
-
Look for a file with the name “Backup of” followed by the name of the missing file,
These files usually have the extenstion “.wbk”.
Search for files with the extension “.wbk.” -
Open any potential backup files you find.
Using Windows Explorer
If you are unable to locate the file press Win+E to open Windows Explorer.
Open the below mentioned file locations in Windows Explorer:
- C:\Users\<<yourusername>>\AppData\Local\Microsoft\Word
- C:\Users\<<yourusername>>\AppData\Local\Temp
- C:\Users\<<yourusername>>\AppData\Roaming\Microsoft\Word
Look for filenames similar to the one that you are looking for or which resemble closely to your unsaved word document
Open Start menu, and search for (.wbk) files. Open any (.wbk) files that appear to determine which is the missing Word document you need.
Search for (.wbk) files from the file explorer to look for similar files.
Word for Office 365, Word 2019, Word 2016, and Word 2013
- On the File menu, select Open, and then Browse. (Some versions, select Computer and then Browse.)
- Under Files of type list (All Word Documents), select All Files.
- Select the backup file that you found, and then select Open.
Word 2010
- On the File menu – select Open.
- Under Files of type list (All Word documents), select All Files.
- Select the backup file that you found, and then select Open.
Use Word to automatically find the AutoRecover files.
Use Word to automatically find the AutoRecover files. To do this, follow these steps:
-
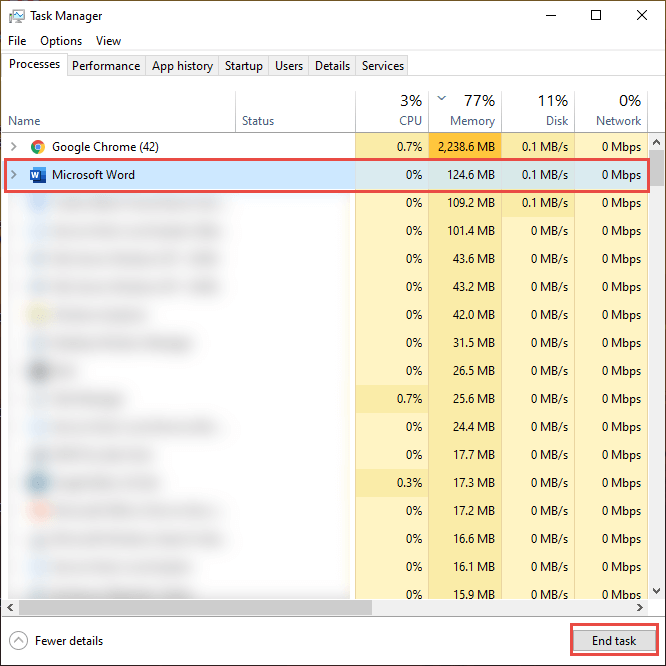
Right-click the taskbar, and then select Task Manager.
-
On the Processes tab, select any instance of Winword.exe or Microsoft Word, and then select End Task or End Process. Repeat this step until you have exited all instances of Winword.exe and Word.
- Close the Windows Task Manager dialog box, and then start Word.
- If the word finds a autorecovery file, the Document Recovery task pane opens on the left hand side menu, and the missing document is mentioned as “Document name[Original Document.]” or as “Document Name[Recovered].” Open the file you want to recover [if present] and click on save as under File Menu and save the document as .docx or .doc
- If the Recovery pane does not open, manually search for AutoRecover files. To do this, use one of the following procedures, as appropriate for the version of Word that you’re running.
AutoSave and AutoRecover Functions:
A little care at the very beginning can save a lot of your time and efforts and amongst these are the 2 mentioned features: Auto Save and Auto Recover.
If you have a Microsoft Office Subscription you will have access to these functions.
Considering the importance of these functions, they are quite underrated.

The AutoSave feature enables you to automatically save the data after a mentioned interval of time on to the OneDrive or SharePoint. This is a premium feature.
To ensure that the toggle button is enabled look for a AutoSave toggle button in the extreme upper left corner of the open word window.
If you are do not have a Office 365 Subscription, no need to worry. We’ve got your back!
The AutoRecover function is available for everyone using the same, it autosaves your files after a fixed period set up in the settings that you determine.
- Goto File Tab and browse to Options.
-
Select Save in the left side menu of the Word Options box as shown in the above screenshot.
-
Select the Save AutoRecover Information Every ‘X’ Minutes checkbox and enter a number in the Minutes box, as per your convenience .
-
Check the ‘Keep the Last AutoRecovered Version if I Close Without Saving’ checkbox as well. This will allow you to recover the most recently saved or unsaved AutoRecovered version, which might not be the complete Word document but will likely be better than no document at all
-
You can also change the location of the recovered files if you do not wish to save in default path. Select the Browse button next to AutoRecover File Location and navigate to the place on your computer where you would like to save them.
-
Click OK to save any changes you make in Word Options.
Search for Temporary Files:
Microsoft operating system always saves files in the background with extension (.tmp). Follow any of the method mentioned below to look for similar files.
Microsoft Windows 10 and Windows 7
- Select Start, type (.tmp) in the Start Search box, and then press Enter.
- Under the Show only toolbar, select Other.
- Scroll through the files and search for files that match the last few dates and times that you edited the document.
- You can also press Win+R for run command.
- Enter “%temp%”
- It will open a folder with all the temporary files, search for files under similar dates or time frames.
Search for “~” files
Temporary file names start with the tilde (~) character. To find these files, follow these instructions below:
Windows 10 and Windows 7
-
Select Start, type ~ in the Start Search box.
-
Select See more results.
Recover a Word Document in Mac (Apple)
The Microsoft Word for Mac provides Autosave option inbuilt.
Accidently if the computer is turned off before saving the word file, it will prompt to open the recover unsaved word file. Or else you can look for the Word file in Autorecover folder.
In Word for Mac 2016, you will first need to ‘show hidden files and folders’ to activate the feature, else search for files similar to windows.
- Open finder
- Click Home icon.
- Open : ‘Library/Containers/com.microsoft.Word/Data/Library/Preferences/AutoRecovery’
- All the documents saved by the AutoRecover Function are saved here
Recovering Deleted Word Document:
If you are looking to recover the deleted word document
- Open Recycle Bin on your desktop.
- Look for the file name, date delete, or the file type whichever suits the purpose.
- You will find the missing document there, just right click on it and click on restore.
- Restore the deleted document and either find it in its original location or click Quick Access to find it in the Recent Files list.
If none of these methods help you recover unsaved word document, the only options that is left is data recovery software or backup software.
On of the best in the market software which help you recover data are listed below.
- Acronis (Paid)
- Disk Drill (Free)
- Stellar Recovery (Free)
- Prosoft Data Rescue
How to Troubleshoot damaged document in MS Word
For more information on this kindly visit the following Microsoft knowledge base.
How to troubleshoot damaged document
Thank you for your valuable time.
You can also view our:


")

